FMP
Practical Skills
Cloud photographs and editing
This lesson I used Adobe Photoshop to edit these up-close cloud photographs taken last week - I wasn't present in the lesson to take photos, so I would like to take my own photographs and edit them when I have the time.


CGI Clouds using Adobe After Effects
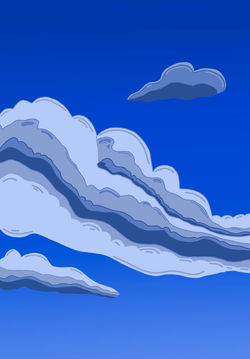
This lesson I followed a tutorial by one of my lectures, in order to complete this cloud animation. I used Adobe After Effects to create a zoom in with moving clouds, I am really pleased with how it turned out as the movement of the clouds are so realistic and feather-like. If i was to change one thing, it would be the background as it is quite a strong blue, something more subtle would look more realistic - I suppose this depends on artistic taste as this shade of blue is very vibrant and exciting.
Clouds time-lapse
Making the books
The point of this lesson was to gather a range of materials and start experimenting with different structures, shapes, textures in order to create something unique and alternative to an ordinary book. I wanted to use cardboard as it is a stronger material that I am able to build easily on and it will hold other materials well.
My first thought was to create a 'stage' almost for different elements to be displayed on, so I produced the base and started to play around with string to resemble clouds/chaos, then a mini 'book' on the other side using brown paper.
Expressive, observational drawing of weather

Creating experimental sketchbooks and challenging the 'ordinary white A4 book'
The objective of this task was to create a range of books from scrap materials and respond to the typical square, A4 book. I also had the chance to base them on weather/clouds or topics/thoughts/feelings related to clouds. In order to prepare for this activity, I produced both a mood board and a mind map on clouds, then a mood board on a range of books/techniques/ideas relating to my plan. During all of these activities, I have also been taking extra notes of any ideas/thoughts that came to mind, this is to ensure my ideas are recorded for development and so I won't forget anything.
Making the books

The point of this lesson was to gather a range of materials and start experimenting with different structures, shapes, textures in order to create something unique and alternative to an ordinary book. I wanted to use cardboard as it is a stronger material that I am able to build easily on and it will hold other materials well.
My first thought was to create a 'stage' almost for different elements to be displayed on, so I produced the base and started to play around with string to resemble clouds/chaos, then a mini 'book' on the other side using brown paper.
However, after completing the first book I soon realised I wanted the contents to be more of a surprise - the satisfaction of opening a book and finding what it's about. In order to act on this, I went home and started reconstructing the book so it could tell more of a story, especially as illustration is one of my main career goals I believe storytelling is a really effective way to not only grab the audience's attention, but it allows myself to become more connected, and eager to finish the piece.
First, I removed the cardboard flaps in order to make the book flatter, later I intend on cuttting the edges into a unique shape/pattern (perhaps zig zags or waves). I still wanted to use the thick string in some way as it helps to drive away from the typical book - I poked holes through the bottom and threaded the string through to resemble a sewed book. The book was then ready for other elements.


Book #2
For this book I used a small,white box to create a garland-like book (again, first thought that came to mind). First, I ripped the box apart creating multiple pages, then using the same thick string, I weaved the string through the holes I made using scissors. As the process and look of this book is more simplistic, I would like to bring this piece to life with multiple illustrations and pictures expressing weather.

Further development to my alternative books
click
After carrying out my research to inform my book, I started gathering materials. The materials varied from cardboard and plastic wrappers, dried flowers/plants, a watercolour cloud painting I did for experimentation, and a magazine quote I thought was fitting as it shows a negative opinion against Global warming.
I stuck the materials down randomly, as I wanted the piece to have a messy, expressive feel, but also considering how waste isn't placed around perfectly. I then added more elements such as bold text stating 'climate change' so it is clear what the book is about, along with contemporary pen illustrations expressing the negatives of climate change - what is causing it, what is happening, etc.
For the pop up rainbow, I used felt tip pens to colour the rainbow, then I folded the paper over and under until it was springy. Next, I added small contemporary illustrations expressing positives/what can be done for climate change, as well as encouraging and motivating words/quotes, for those who are anxious about the devastating impact on our world.
Finally, I will take a good quality photograph that is displayed thoughtfully.
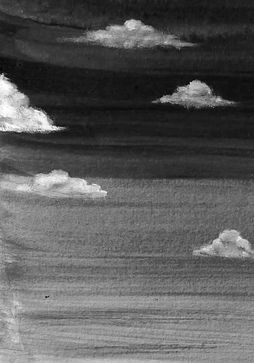
Another idea I initially thought of was having a pop up rainbow or cloud. For the painting, I used a bright blue watercolour and blended from dark to light creating a streaky, slight gradient sky. I then used white acrylic to gently paint the clouds in circular motions, using less paint as I went outwards to achieve a fluffy effect.
outcome


Experimenting with materials to create a 3D model informed by clouds/weather
With the materials available to us at college, I worked with a partner to create a response to the theme of clouds/weather. We took inspiration from the artists/pieces my lecture presented (clouds - fashion, sculptures, 2D art, etc.), to research into weather machines/detectors.
The process
Initially, I was drawn towards the glass sphere and decided to recreate this with cardboard as it would hold the structure best. For the metal parts, I used metal wire as its a more flexible material.


During the making process, me and my partner found the piece not turning out as expected - we also felt inspired by our peers' work and decided to adapt our concept into a cloud machine by adding stuffing to the cardboard windmill, to insinuate clouds are being made. Once the model was finished, I used Photoshop to edit by adding a blue colour burn gradient effect, blue reminds me of rain so that is the reasoning behind the editing - I wanted to explore what this model would look like in a surreal world.


Composition and pattern


DRawing robot - illustration response from drawing machines

Digital experimentation
Simplistic illustration
Response to natural history museum/weather with patterns
DEtailed weather illustrations/digital paintings
the process


the process
weather animation
the process
Idea Factory


response to 'cloudy with a chance of meatballs' film/consumerism


the process
the process

the process

the process


the process

printmaking
 |  |
|---|---|
 |  |
 |  |
 |  |
 |  |
 |  |
 |


Paint experimentation

Theme Moodboards
I have created a range of mood boards using several 'British Journal of Photography' magazines, to explore the themes that will be included in my final outcomes. I have experimented with collage techniques learnt from my previous project 'Self and Place', tissue paper, blank ink pen for pattern/mark making, felt shapes, yellow thread to represent maps and an unused photography colour sheet. I was also inspired by works from The Design Museum in London.
waste


consumerism


weather


place


illustration techniques, mark making and watercolour


30 ideas in 30 minutes


Place illustration and photography


moodboard and designing


Testing brushes and colours


